Assembling your Vention machine
Contents
Ready to assemble your first Vention design? This guide presents all the tools and resources you will need for a successful assembly from start to finish.
Before you order
Get an application engineer to review your design
Once you have finished designing and are ready to order, you can submit your design for a complimentary design review with our application engineers. They each have worked on hundreds of projects and know our hardware inside and out, making them the best resource for a quick final check of any design.
You can request a design review within MachineBuilder, either on your designs page or from the checkout page. Alternatively, you can use “Design Checker” providing an automatic validation to key design considerations. This feature is also available inside MachineBuilder
Choosing assembly services
Vention offers assembly services for certain machines. If your order qualifies for assembly services, this option will become available for you to add during checkout. Our team of experienced assemblers will pre-assemble your equipment and ship it to you ready for site deployment. Note that choosing the “ship assembled” option will affect the delivery time, as most of our pre-assembled equipment are shipped by ground service.
Single-tool assembly and supplies
Vention’s modular components have been developed with ease of assembly in mind. Using a single 5-mm T-Handle Hex Key , you can put together your entire machine. We’ve taken care to develop a modular hardware kit, which makes our users’ lives much easier by standardizing fastener types and lengths.
Fun fact: You can use a single 5-mm T-Handle Hex Key to put together all sizes of extrusion profiles, from the 22.5 x 22.5 mm to 90 x 90 mm profile.
If your machine includes parts and hardware that require specialized tools, these will become available to add to your order once you start the checkout process.
What’s in the box
When your machine arrives, be sure to look for the box marked Open Me First. It contains all the documents you’ll need, as well as a few tools and additional goodies courtesy of the Vention team.
We strongly recommend unpacking all the boxes and organizing your parts and materials before you start assembling. It’s best to group similar parts together. Ensure you understand your bill of materials (BOM), and match all parts received to the items on the BOM. This makes it easier to find the right part as you go. Note that all parts (except extrusions) have part numbers engraved on them for easy identification.
Key documents that arrive with your machine:
- Bill of materials: A complete list of all the parts included in your shipment. The BOM also lists any fasteners required for each part.
- Assembly instructions: These auto-generated instructions break larger assemblies down into simpler sub-assembly steps. For each step, you will find a list of parts and associated fasteners. You can download an example of assembly instructions here.
- Automation system drawings: When relevant, your machine will arrive with an assembly system drawing to support you in commissioning your MachineMotion controller.
- Online CAD: We recommend giving your assembly team access to the online model of your design so they can consult it if they have questions during assembly.
From our team
If you face any challenges during assembly, our support team is here to help. You can reach them via online chat at vention.io, by phone at 1-800-940-3617, or by email at support@vention.cc.
Happy building!
Getting started
About the assembly instructions
In the provided instructions, your assembly is broken down into steps with both an exploded view and a completed view. Each component is identified along with its corresponding fasteners. You’ll also find general information on how to begin assembling, which tools you’ll need, and some advanced tips.
Using MachineBuilder during assembly
Add your assembly team as design collaborators or send them a private link so they can view the design in 3D while they assemble. Within MachineBuilder, several key features support easy assembly:
- Tree view. Shows part numbers along with associated fasteners when you select any part in the model. (Tip: The last four digits of a fastener or extrusion’s part number indicate its length.)
- Exploded view. Shows how parts fit together. (Tip: Select multiple components, then click Exploded view to explode only those highlighted components.)
- Measurement tool. Click to measure distances face to face, edge to edge, and point to point. (Tip: After measuring point to point, click on your result to get the dx, dy, and dz measurements.)
- Annotation tool. Annotate your parts by Vention part numbers or length.
Installing t-nuts
All profiles sizes use the same t-nut. They’re easy to install and remove from the ends of extrusions, and apart from the 22.5 x 22.5 mm profile, you can also install and remove t-nuts anywhere along the extrusion length.
The sprung detent on the bottom keeps the t-nuts from sliding around during assembly. Use the Vention ruler to space out t-nuts to easily assemble components.
Tip: Loosely attach t-nuts to frame components with a fastener, then slide them into an extrusion. This prevents you from having to align multiple t-nuts in a row.
Tapping extrusions
Apart from the 22.5 x 22.5 mm profile, all extrusion ends can be tapped for a standard M8 fastener. Most designs involve extrusions that will need to be tapped. Refer to the detailed tapping guide for more information.
Creating joints with extrusions
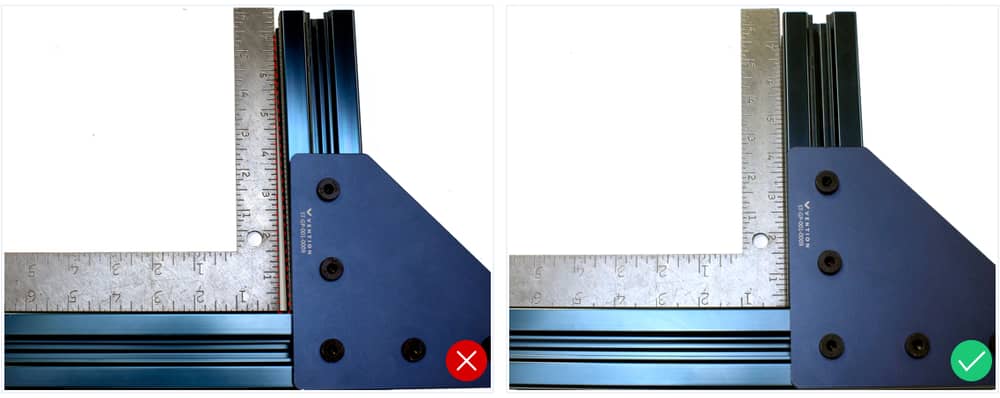
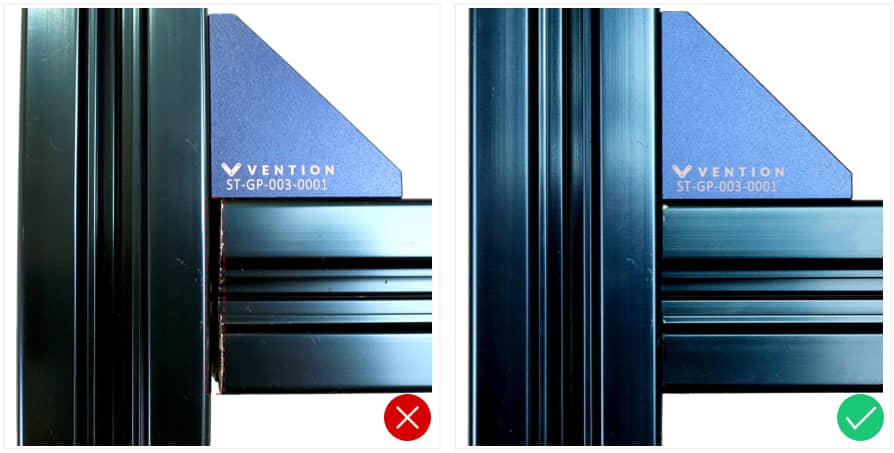
Frame components, especially those with HP features, will facilitate a good, square joint with lengths of extrusion. Making an effort to eliminate gaps between extrusions along with checking perpendicularity with a framing square, will ensure a smooth assembly process as well as a high quality assembly. In some cases, it can also be advantageous to not fully tighten certain components that may make it difficult to insert extrusions further along in the assembly process.
When ready, tighten all M8 bolts to between 13 and 16 Nm. Most people can comfortably achieve these values by turning the standard T-handle hex key with a single hand.


General assembly sequence
It’s usually best to assemble by starting from the bottom and working your way upward, especially if your machine will become harder to move and orient as you get closer to completing it. Smaller assemblies, on the other hand, might be easier to put together on their side or even upside down. Pre-assembling multiple components on a workbench or flat surface can also simplify the process.
Tip: Take note of any panels included in your assembly before beginning. Panels that are mounted in the extrusion slots must be slid in place during the assembly process.
Finishing your assembly
Upon finishing your assembly, check once more that all fasteners have been tightened, all components have been installed in the correct locations, and no other details (like end caps or handles) have been overlooked.
Please note that many actuators need lubricating before operation. Refer to our online resources for specific components for further details on installation and maintenance.